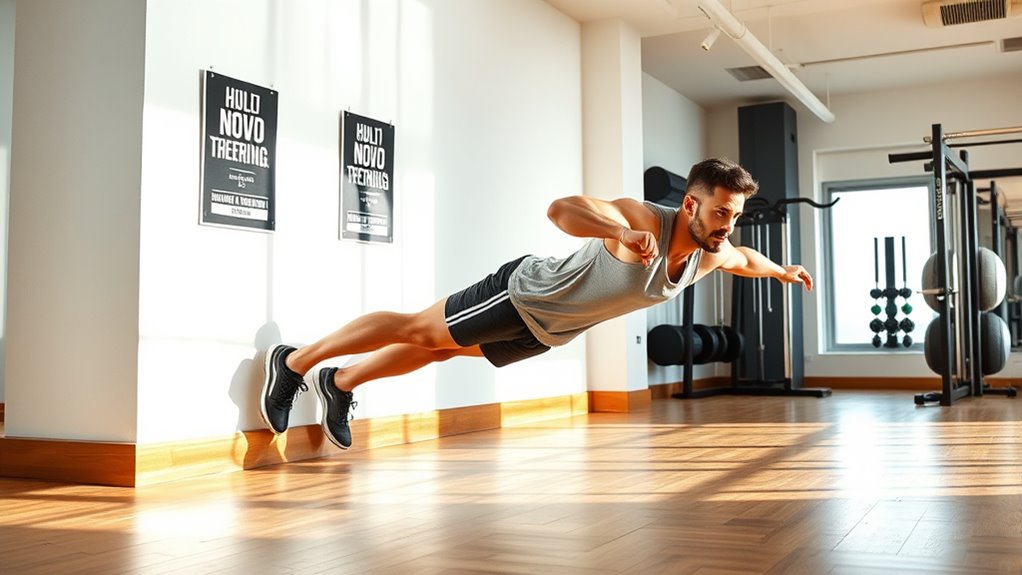
To progress quickly from zero to full push-ups, start with wall push-ups to build initial strength, then move to incline and knee push-ups as you grow stronger. Focus on proper form, engaging your core and glutes, and gradually increase reps while adjusting angles. Incorporate varied push-up types to target different muscles, stay consistent, and take rest days to recover. Keep consistent effort, and you’ll release those reps faster—more tips ahead to guide your journey.
Key Takeaways
- Start with wall push-ups to build initial strength and proper form before progressing to knee and incline variations.
- Incorporate negative push-ups with slow eccentric lowering to develop control and muscle strength efficiently.
- Gradually increase difficulty by decreasing incline height or moving from knee to standard push-ups as strength improves.
- Use consistent hand placement, core engagement, and proper technique to maximize muscle activation and prevent injury.
- Schedule rest days to allow recovery, monitor progress, and prevent overtraining, ensuring steady and sustainable improvement.
Top picks for "push progression real"
Open Amazon search results for this keyword.
As an affiliate, we earn on qualifying purchases.
Assessing Your Starting Point and Setting Goals

Before you begin your push-up journey, it’s important to accurately evaluate your current fitness level and set realistic goals. Start by testing how many push-ups you can do in one go, using proper form. If you can’t perform many, don’t worry—this helps you understand your baseline. Consider your overall strength and any limitations or injuries. Set specific, achievable targets, like doing five push-ups in a row or increasing your reps weekly. Remember, progress takes time, so avoid rushing. Document your starting point and goals to track your improvements. This honest assessment ensures you choose the right starting exercises and stay motivated as you work toward building strength and endurance. Additionally, understanding your initial fitness level can help you select appropriate exercises and avoid overtraining. Recognizing your current strength capacity is essential for tailoring your progression plan and preventing injury. To optimize your progress, it’s helpful to familiarize yourself with training principles that guide safe and effective training routines. Incorporating progressive overload ensures gradual improvements without risking burnout or injury. Being aware of recovery strategies can further enhance your results and prevent setbacks.
Mastering the Wall Push-Up
To master the wall push-up, start by placing your hands at the correct height and distance apart to guarantee proper form. Focus on building your upper body strength gradually, using this exercise as a foundation. With consistent practice, you’ll improve your technique and prepare for more challenging push-up variations. Additionally, understanding muscle activation patterns can help you optimize your workout efficiency and prevent injury. Recognizing the importance of craftsmanship in exercise can further enhance your ability to perform movements safely and effectively. Paying attention to exercise technique ensures correct movement execution, reducing the risk of strain or injury. Being aware of athlete backgrounds and their journeys can motivate you to stay committed and refine your form over time. Incorporating safety considerations into your routine helps ensure sustainable progress and injury prevention.
Proper Wall Hand Placement
Proper hand placement is essential for performing wall push-ups correctly and safely. Position your hands shoulder-width apart on the wall, slightly below shoulder level. Keep your fingers spread out to improve stability and grip. Avoid placing your hands too high or too low, as this can strain your shoulders or reduce effectiveness. Your palms should be flat against the wall with your wrists aligned under your shoulders. Maintain a slight bend in your elbows at the start, ready to lower yourself smoothly. Keep your hands steady and avoid shifting them during the movement. Proper placement guarantees even distribution of weight, reduces the risk of injury, and helps target the right muscles. Consistent hand positioning is crucial for muscle engagement and building strength effectively as you progress to build strength and confidence. Additionally, understanding the influence of contrast ratio can help you optimize your training environment by ensuring adequate lighting conditions for safety and focus. Being aware of proper ergonomics can further prevent strain and promote correct form during your exercise.
Building Upper Body Strength
Building upper body strength with wall push-ups requires consistent practice and proper technique. You should start by positioning yourself an arm’s length from the wall, keeping your body straight and engaged. Focus on maintaining a firm core and controlled movements, lowering your chest toward the wall while keeping your hands planted firmly. As you become more comfortable, increase the number of repetitions and gradually move closer to the wall, which adds resistance. Remember, quality matters more than speed—slow, controlled reps build muscle effectively. Incorporating connected fitness technology into your routine can help track your progress and ensure proper form. Additionally, tracking your progress over time can motivate you to stay consistent and improve steadily. Establishing a regular workout schedule can enhance your results and build momentum. Incorporating wall push-ups into your routine regularly, aiming for daily or every other day sessions, creates consistent training habits that foster strength gains. Over time, this progression will strengthen your chest, shoulders, and triceps, setting a solid foundation for more advanced push-up variations. Consistent practice ensures your form stays correct, which is essential for safe and effective muscle development.
Progressing to Incline Push-Ups

If traditional push-ups feel too challenging at first, progressing to incline push-ups offers an effective way to build strength gradually. By elevating your hands on a sturdy surface, you reduce the load and make the movement easier. This adjustment helps you develop proper form and build confidence before moving to standard push-ups. To effectively progress, consider these tips:
Elevate your hands on a sturdy surface to build strength and confidence before standard push-ups.
- Start with a high surface like a countertop or table
- Keep your body in a straight line from head to heels
- Focus on controlled, steady movements
- Increase the incline height as strength improves
- Maintain consistent breathing throughout each rep
- Be mindful of proper home maintenance to ensure your workout space remains safe and clean.
Incline push-ups are a great stepping stone, allowing you to work on push-up mechanics without overexertion. Use this progression to develop the strength needed for more challenging variations.
Building Strength With Knee Push-Ups

Knee push-ups are an excellent way to develop upper body strength without the full weight of a standard push-up, making them ideal for beginners or those recovering from injury. By reducing the load, you can focus on building proper movement patterns and engaging your chest, shoulders, and triceps effectively. Start by placing your knees on the ground, keeping your body in a straight line from your knees to your head. Lower yourself slowly, maintaining control and tight core engagement. Push back up, feeling the muscles work. As you gain strength, gradually increase reps and sets. Progression of push-up variations helps you develop the foundational strength needed for full push-ups, making them a vital step in your advancement toward more challenging workouts. For better results, keep your form and organization consistent to track your progress effectively, and consider incorporating muscle activation techniques to maximize engagement during each rep. Regularly practicing proper training techniques ensures steady improvement and helps prevent injury. Incorporating progressive overload principles can also accelerate your strength gains over time.
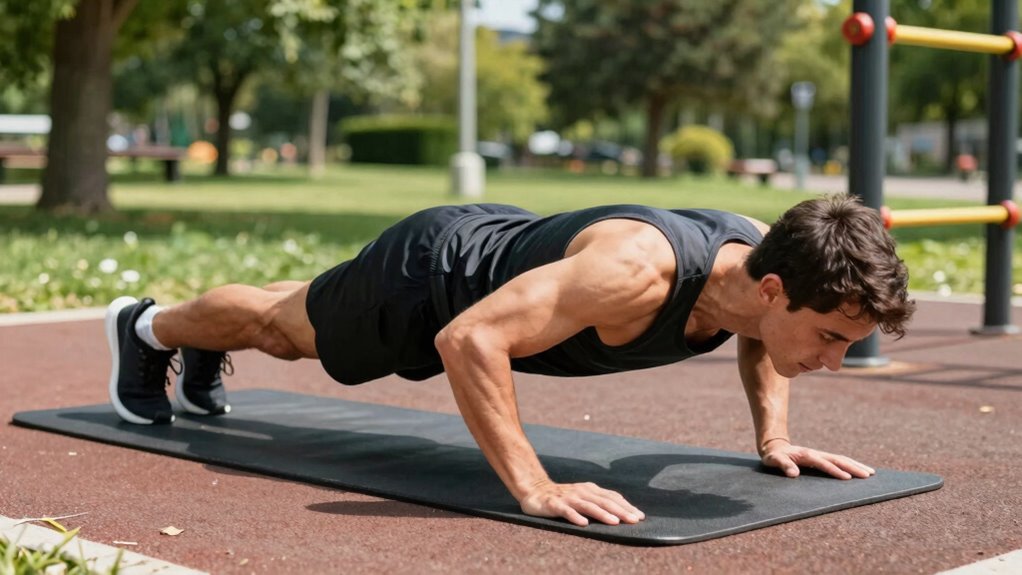
Perfecting Form and Technique

To improve your push-up form, focus on placing your hands correctly—shoulder-width apart with fingers spread for stability. Engage your core and glutes throughout the movement to maintain a straight line from head to heels. These adjustments will help you perform each rep safely and effectively.
Proper Hand Placement Techniques
Proper hand placement is essential for maximizing the effectiveness and safety of your push-ups. Your hands should be positioned to support your body weight comfortably while engaging the right muscles. Proper placement reduces strain and prevents injury. Place your hands slightly wider than shoulder-width apart, with fingers spread for stability. Keep your wrists aligned with your forearms to avoid discomfort. Ensure your elbows are at a 45-degree angle when lowering, not flaring out or tucked in. Your palms should be flat on the ground, with evenly distributed weight. Focus on maintaining a firm grip to stabilize your upper body. Correct hand placement optimizes muscle activation and helps you progress faster.
- Keep hands slightly wider than shoulders
- Distribute weight evenly across palms
- Align wrists with forearms
- Keep elbows at a 45-degree angle
- Maintain a firm grip for stability
Engaging Core and Glutes
Engaging your core and glutes is essential for maintaining proper push-up form and preventing injury. When you tighten these muscles, you create a stable, straight line from your head to your heels, avoiding sagging or piking. To do this, brace your abdominals as if preparing for a punch, and squeeze your glutes as if trying to hold a coin between them. This engagement supports your lower back and keeps your hips aligned. Focus on maintaining this tension throughout each rep, especially as you lower and push back up. Proper core and glute activation not only improve your stability but also make each movement more efficient, helping you build strength faster while reducing the risk of strain or injury. Additionally, understanding and practicing proper setup techniques can further enhance your form and safety during push-up exercises.
Incorporating Negative Push-Ups for Eccentric Strength

Incorporating negative push-ups into your routine is a highly effective way to build eccentric strength, which is essential for improving overall push-up performance. This method focuses on lowering your body slowly and under control, maximizing muscle engagement during the descent phase. By emphasizing the eccentric portion, you strengthen the muscles responsible for controlling movement, making it easier to push back up.
To get started, try these ideas:
- Lower yourself slowly over 3-5 seconds
- Use a step or bench for assistance to control your descent
- Focus on maintaining proper form throughout
- Incorporate negatives into your regular push-up sets
- Gradually increase the duration of your lowering phase
These techniques accelerate strength gains and prepare you for more advanced push-up progressions.
Introducing Push-Up Variations for Progression

Building on your work with negative push-ups, introducing variations can substantially challenge your muscles and promote steady progression. These modifications target different muscle groups, improve stability, and help you overcome plateaus. For example, incline push-ups reduce load, making them easier, while decline push-ups increase difficulty by shifting more weight onto your arms. You can also experiment with hand position changes like diamond or wide grip push-ups to activate different muscles.
| Push-Up Variation | Focus Area |
|---|---|
| Incline Push-Ups | Lower chest and shoulders |
| Decline Push-Ups | Upper chest and triceps |
| Diamond Push-Ups | Triceps and inner chest |
| Wide Grip Push-Ups | Chest and shoulder engagement |
| Pike Push-Ups | Shoulders and upper chest |
Developing Core and Stability for Better Push-Ups

A strong core and stable shoulders are essential for performing push-ups effectively and safely. When your core is engaged, it keeps your body aligned, preventing sagging or arching that can lead to injury. Stable shoulders ensure proper movement and reduce strain on joints. To build this stability, focus on exercises that target these areas.
- Planks and side planks to improve overall core strength
- Dead bugs and bird dogs for dynamic stability
- Shoulder taps to enhance shoulder control
- Hollow holds to reinforce core engagement
- Anti-rotation exercises like Pallof presses
Incorporating Push-Up Drills and Frequency

To improve your push-up performance, adding specific drills and increasing your practice frequency can make a significant difference. Incorporate drills like wall push-ups, incline push-ups, and knee push-ups to build strength gradually. These help target different muscles and improve form without overtaxing your muscles. Consistency is key—aim to practice push-ups at least 3-4 times a week, gradually increasing volume. To visualize your progress and plan effectively, consider this table:
| Drill Type | Frequency | Focus Area |
|---|---|---|
| Wall Push-Ups | 2-3 times per week | Shoulder stability |
| Incline Push-Ups | 3-4 times per week | Upper chest and triceps |
| Knee Push-Ups | Daily or every other day | Overall strength |
This structured approach accelerates gains and keeps your training effective.
Tracking Progress and Overcoming Plateaus

To keep improving, you need to track your rep counts regularly so you can see your progress. If you hit a plateau, try adjusting the exercise intensity or adding rest days to give your muscles time to recover. Staying consistent and making small changes helps you push past sticking points and keep advancing.
Monitoring Rep Counts
Have you ever wondered how tracking your reps can help you break through plateaus? When you monitor your rep counts, you gain insight into your progress and identify patterns. This awareness allows you to set realistic goals and adjust your training accordingly. Keeping detailed records can help you notice improvements over time, even when progress feels slow. It also highlights when you’re ready to push further or need to take a recovery day. To make tracking effective, consider:
- Recording each workout in a journal or app
- Noting the number of reps per set
- Tracking fatigue levels and form quality
- Noting rest periods between sets
- Comparing weekly progress to identify plateaus
This approach keeps you focused and motivated, ensuring steady advancement.
Adjusting Exercise Intensity
Adjusting exercise intensity is essential when you hit a plateau or want to challenge your muscles further. If your push-up reps stall, try increasing difficulty by elevating your feet or adding a weighted vest. You can also slow down your movement to increase time under tension, making each rep more challenging. Conversely, if reps become too difficult, reduce intensity by performing incline push-ups or decreasing reps temporarily. Tracking your progress helps identify when to make these adjustments. Small modifications can reignite progress and prevent frustration. Remember, progression isn’t always about more reps; it’s about increasing effort and challenge strategically. By tuning exercise intensity, you ensure consistent overload, which is key to building strength and advancing toward your push-up goals.
Incorporating Rest Days
Incorporating rest days into your push-up routine is crucial for tracking your progress and overcoming plateaus. Rest allows your muscles to recover, reducing injury risk and preventing burnout. It also helps you evaluate your improvements objectively, so you can adjust your training effectively. By giving your body time to repair, you’ll notice increased strength and endurance over time. Rest days are also essential for mental clarity, keeping you motivated and focused on your goals. Consider these points:
- Prevents overtraining and injury
- Lets muscles recover and grow stronger
- Helps you monitor progress more accurately
- Keeps motivation high by avoiding burnout
- Allows time for mental and physical reset
Incorporate rest strategically to optimize progress and push past sticking points.
Frequently Asked Questions
How Long Should I Practice Each Push-Up Progression Before Moving to the Next?
You should practice each push-up progression for about one to two weeks, or until you can perform it confidently with proper form for at least 8-12 repetitions. Focus on mastering the current level before moving on, ensuring your strength and technique improve steadily. If you find yourself struggling or unable to maintain good form, spend more time on that progression. Progress at your own pace to prevent injury and build a solid foundation.
Can I Do Push-Ups Every Day or Should I Rest Between Sessions?
You can do push-ups every day if you listen to your body. However, it’s best to rest at least one day a week to allow muscles to recover and prevent overtraining. Incorporate rest days or alternate push-up types to avoid fatigue and injury. Pay attention to how you feel, and if you notice pain or excessive soreness, give yourself extra rest to promote progress and stay safe.
What Are Common Mistakes That Hinder Progress in Push-Up Training?
Imagine trying to build a house with shaky foundations—that’s what poor form does to your push-up progress. Common mistakes like arching your back, letting your elbows flare out, or rushing reps slow your gains. You might also neglect proper warm-up or overtrain without rest. Focus on controlled movements, keep your core tight, and listen to your body. Correcting these habits helps you build strength faster and prevents injuries.
How Can I Modify Push-Ups for Different Fitness Levels or Injuries?
You can modify push-ups based on your fitness level or injuries by adjusting hand placement, using supports, or reducing depth. For beginners, try wall push-ups or knee push-ups to build strength gradually. If you have injuries, consult a healthcare professional and opt for seated or incline push-ups to avoid strain. These modifications help you stay active safely while progressing toward full push-ups.
Are There Recommended Supplements or Diets to Enhance Push-Up Strength?
To boost your push-up strength, focus on a balanced diet rich in protein, healthy fats, and complex carbs to fuel muscle growth and recovery. Supplements like whey protein, creatine, and BCAAs can support your training, but they’re most effective when combined with consistent workouts. Make sure to stay hydrated and get enough rest, as proper nutrition and recovery are key to improving your push-up performance faster.
Conclusion
Remember, your push-up journey is like climbing a mountain—you start with small steps, but each effort brings you closer to the summit. Keep evaluating your progress, stay consistent, and embrace the challenge. Every rep builds strength and confidence, turning your potential into achievement. Stay patient and persistent, because the peak is within reach. With dedication, you’ll transform your initial struggles into a powerful, unstoppable force. Keep pushing forward—you’re stronger than you think.